Note. I'm using the pattern notation introduced by Benns & Barrett in Tak V Bowes Departed. Thus, I did not invent the notation, but I have drawn all the charts by myself as well as taken all the photos and videos.
Hand and loop position
The hands are held with palms facing. The loops of yarn are placed on fingers that are slightly crooked, according to the pattern. In the medieval patterns index finger is A, middle finger B, ring finger C and little finger D. The thumb doesn't get yarn loops, but can be used to help with braiding. If there are fingers that can have a loop, but don't, those are marked with an x inside a circle.

If I only have one loop on a finger, I try to keep it in the crease nearest the tip of the finger. I find that braiding is easier if the loops are not too low down on the fingers. Some patterns call for two loops on one finger, and then I place one in the second crease, and one in the first crease in the order indicated in the pattern.
Note that each loop has two shanks, upper shank (the one closer to thumb) and lower shank (the one closer to the little finger). As mentioned on the warping page, there are braids with bicolour loops, and then the upper shank and the lower shank are of different colours which is indicated by the color of the little circles (there's an example further down).
Braiding movements
You can either exchange two loops or take a loop, often through other loop(s). Loops can also be moved lower or higher on the fingers. What is not mentioned in the instructions is that after every time you have exchanged or taken loops, you need to tighten the braid by pulling your hands apart. (You'll see this in my videos later.)
Exchanging loops
In an exchange, two loops change places so that one goes through the other. Usually it doesn't matter which one goes inside and which outside, as long as you are consistent. In a pattern chart an exchange is indicated by a double-headed arrow.
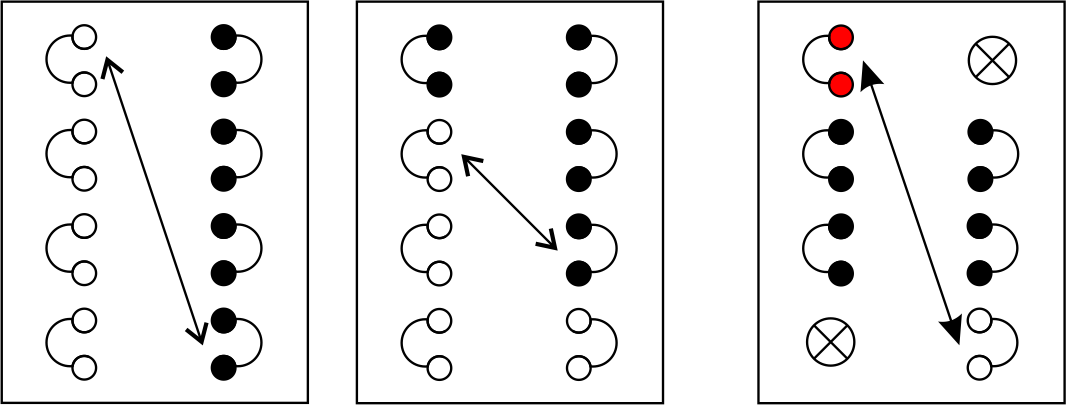
The first chart reads: "A left and D right exchange". The second chart reads: "B left and C right exchange". The third chart is the same as the first one, just in a different braid.
Not sure what I mean? Watch a tiny video. On the video you can see that for me the left loop goes through the right loop, because this is the way I'm most comfortable with.
Taking a loop
Taking a loop means mostly picking up a loop from the other hand. In the braids I've chosen for this course, you go through one or several loops before taking the indicated loop from the other hand. You can take a loop unreversed, i.e. from upper shank, or reversed, i.e. from lower shank. This is very important, as mixing these two up often causes problems, for example instead of one round braid you get two smaller braids.
On the charts taking a loop is marked with an one-directional arrow. The arrow points to the shank you need to pick up, either upper shank (unreversed) or lower shank (reversed).
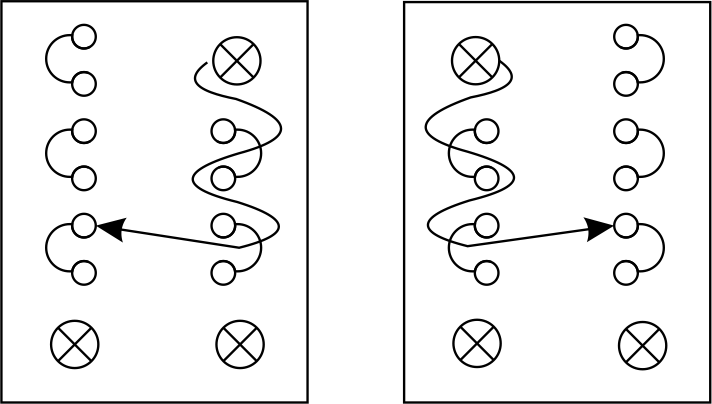
The first chart reads: "A right goes through B right and C right and takes C left unreversed". Consequently, the second chart reads: "A left goes through B left and C left and takes C right unreversed". (There is a not great video, but don't worry, you'll see more videos later. You'll also need the reversed taking a lot more than the unreversed.)
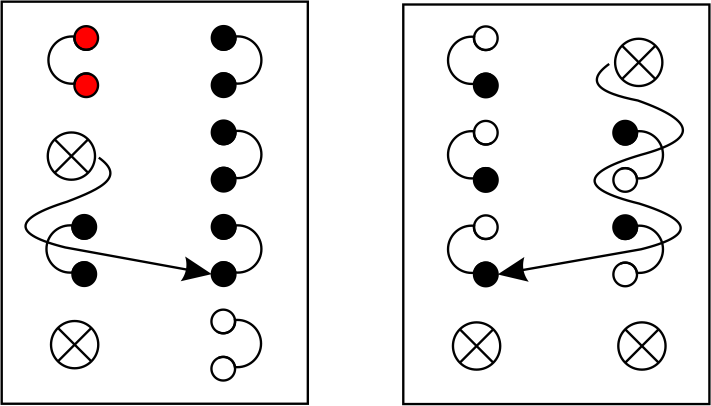
Here the first chart reads: "B left goes through C left and takes C right reversed". The second one reads: "A right goes through B right and C right and takes C left reversed". You can see that the second one has departed (bicolor) loops. Because C left has a dark shank lower down and the loop is taken reversed, the dark shank will end up on top at the right when the movement is finished. You can see on my video that I turn the passive hand to make access to the lower shank easier. (Again, you'll see more videos on this later.)
If you proceed to the more advanced pattern (Feeling nimble today?), you'll notice that sometimes you take a loop without going through other loops. Even then make sure that you are taking the loop the correct way (unreversed or reversed).
Moving loops
Typically after you've taken a loop, you need to move the loops on the other hand for the braid to proceed. You can move loops down, i.e. towards the little finger, or up, i.e. towards the thumb. If you have to move several loops, you start by moving the one that goes to an empty finger. On a chart moving is marked with an arc with an arrowhead in the middle indicating the direction. Important: Loops are usually moved unreversed, make sure they do not get twisted when you move them (this is usually a problem only if you use the thumb to help with the move).
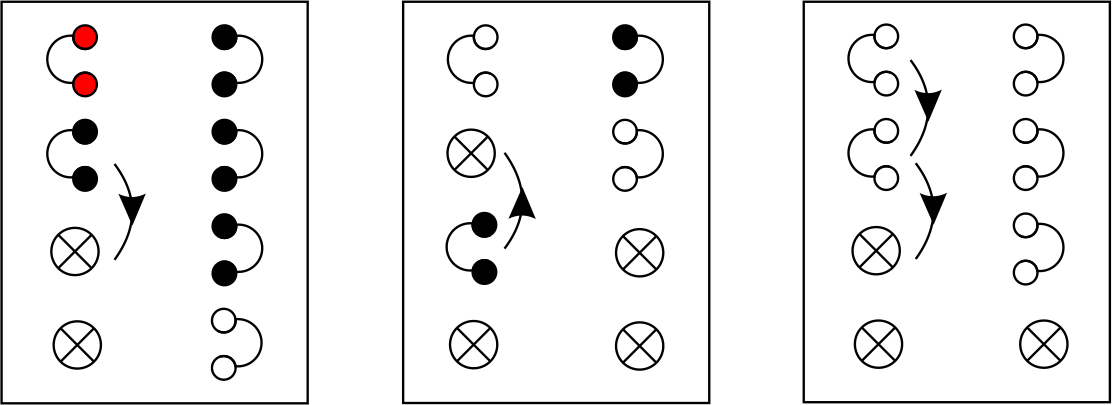
Here the first chart reads: "Move (or shift) B left to C left". The instruction can also simply say "low B left" assuming that you know that in that case the loop moves down by one finger. The second chart reads: "Move C left to B left". It could say "high C left" assuming that you know to move the loop up by one finger. The third chart reads: "Move B left to C left and A left to B left". It could also just say "low left loops" or "low A left and B left" assuming that you know that you are supposed to lower the loops by one finger. I cannot think of any patterns where you move a loop by more than one finger. It's always one down or one up. But, as you can see in the first chart, it can be just one loop that moves and the second one doesn't follow as you could expect (compare first and third charts to see the difference).
The next lesson is your first braid, Lace Bend Round.